 Automation-friendly framework for Continuous Testing


 Automation-friendly framework for Continuous Testing
Running Taurus with TeamCityBy: Yuri Bushnev, June 2017 Taurus is an open source framework for performance tests automation. It can be used to run scripts from scratch as well as allows running tests from other open source tools. These include JMeter, Gatling, Selenium or Locust. Taurus simplifies use of existing automation tools and provides a user-friendly and convenient "wrapper". One of Taurus's main strengths is that it can be integrated with any continuous integration servers in just a few steps. Using CI servers helps us automate test execution and avoid the routine actions if running our scripts again and again. In this article we are going to find out how we can easily run our Taurus performance script in the TeamCity continuous integration server. You can also find tutorials for other CI solutions: Jenkins and Bamboo on the Taurus website. Creating a Taurus ScriptFirst, let’s create our first Taurus performance script: execution: - concurrency: 100 ramp-up: 40s hold-for: 1m scenario: Open-BlazeDemo scenarios: Open-BlazeDemo: requests: - url: http://blazedemo.com/ Taurus scripts can be written using JSON or YAML formats. As you can see, it is human-readable. You don’t need to be a genius to find out that this current script performs:
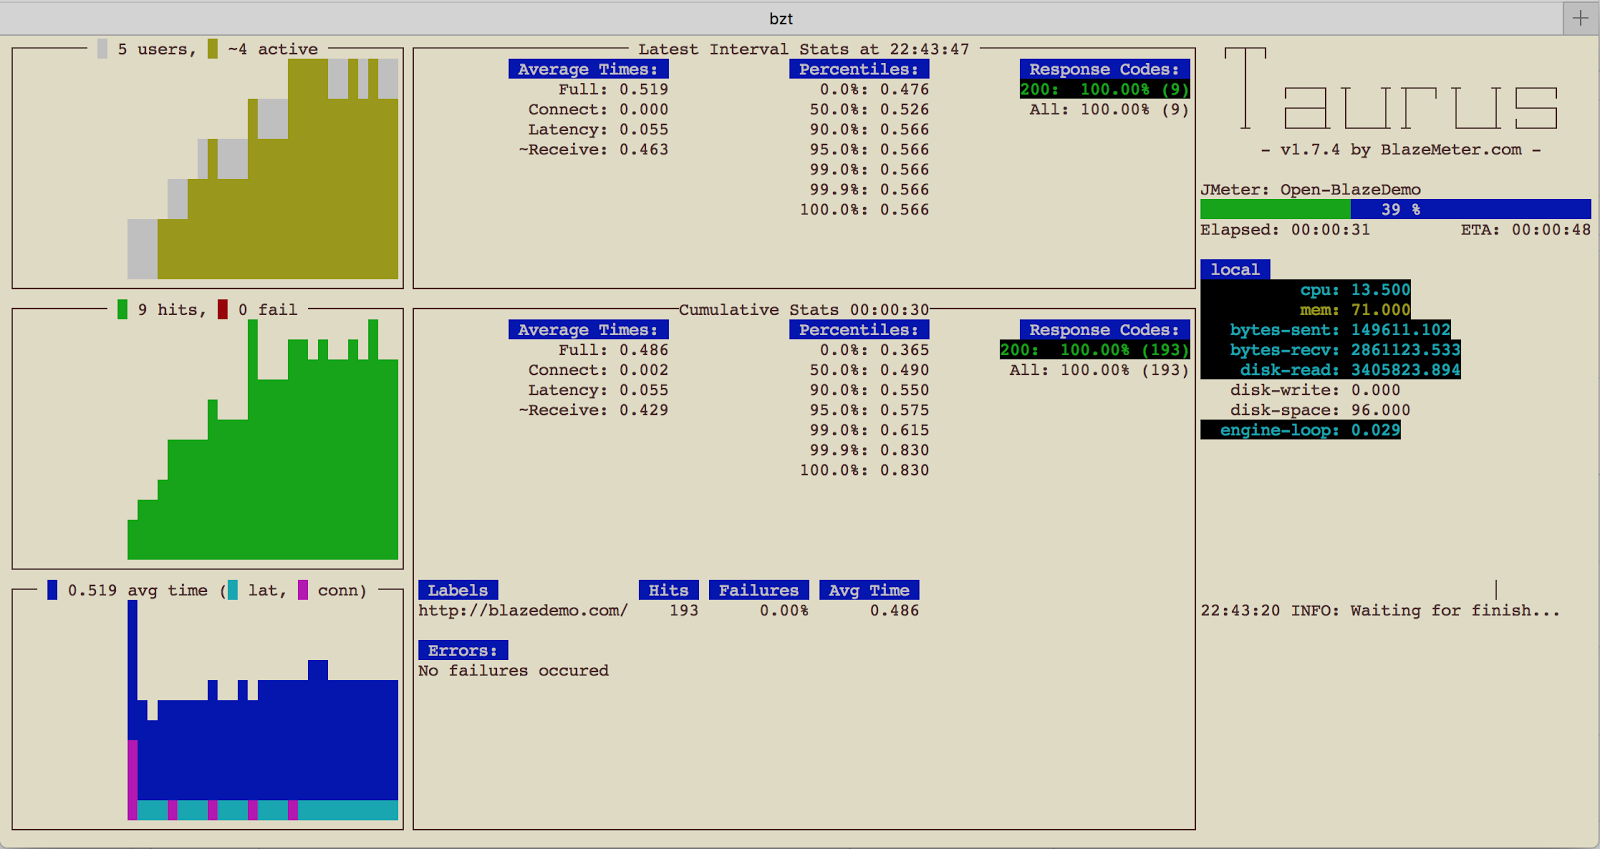
If you have already installed the Taurus framework (installation steps can be found here) then the existing script can be easily run by this command: bzt [path to the script] Let’s save our created script as ‘BlazeDemoTest.yml’ and run the command: bzt /Users/BlazeMeter/tests/BlazeDemoTest.yml As soon as script has been started, we will get real time performance metrics.
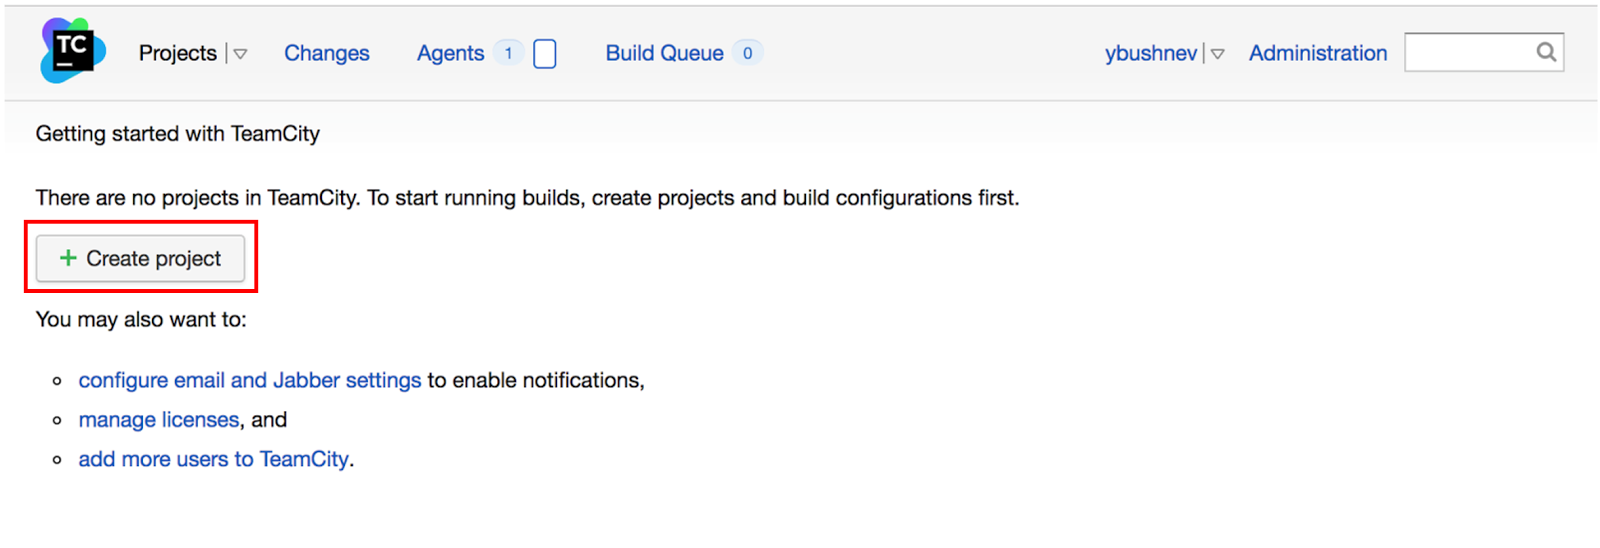
Running Your Taurus Script in TeamCityNow we are ready to move the created script into the TeamCity integration server. TeamCity is one of the most popular continuous integration servers. It was developed by JetBrains company, and it is a commercial software. However, open source projects can request a free license. The main advantage of this continuous integration server is that it provides great usability out-of-the-box. It also has a user-friendly interface which makes it easy to use, even for someone new to continuous integration solutions. Let’s assume that you already have TeamCity integration server. If no, you can find straight forward installation steps on JetBrains official website. First, we should create a new project.
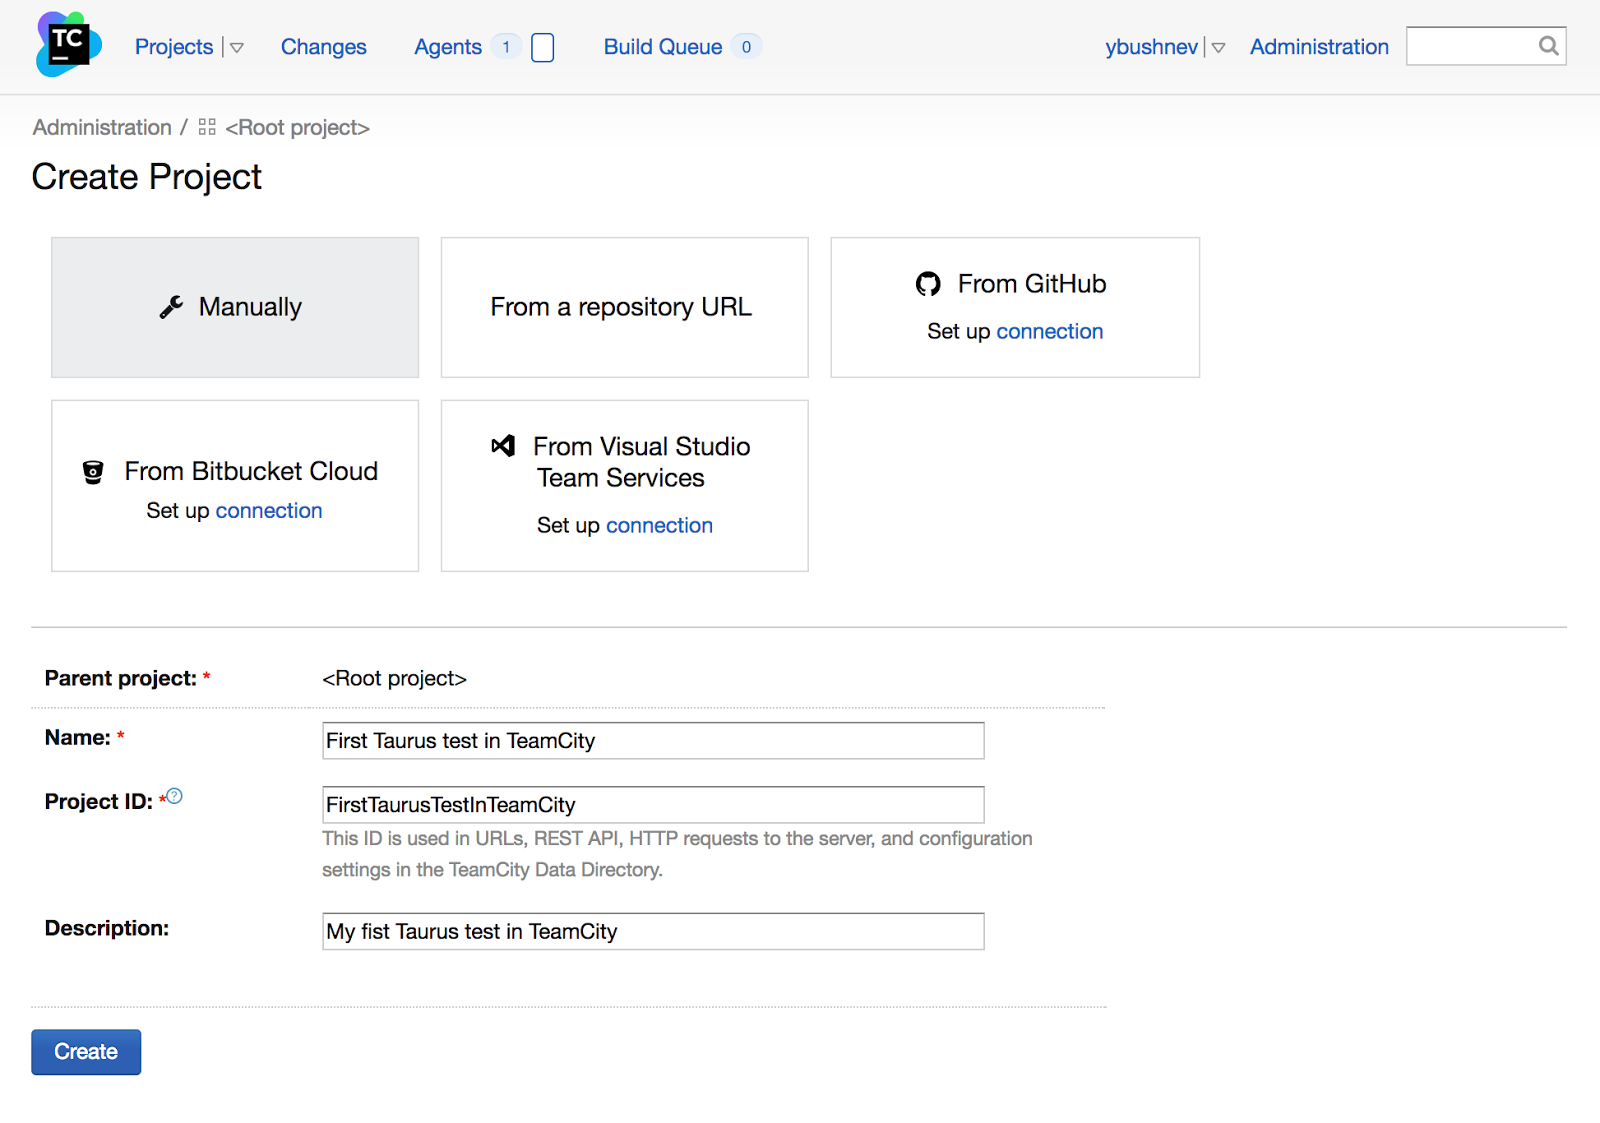
During project creation you will see a few integration options:
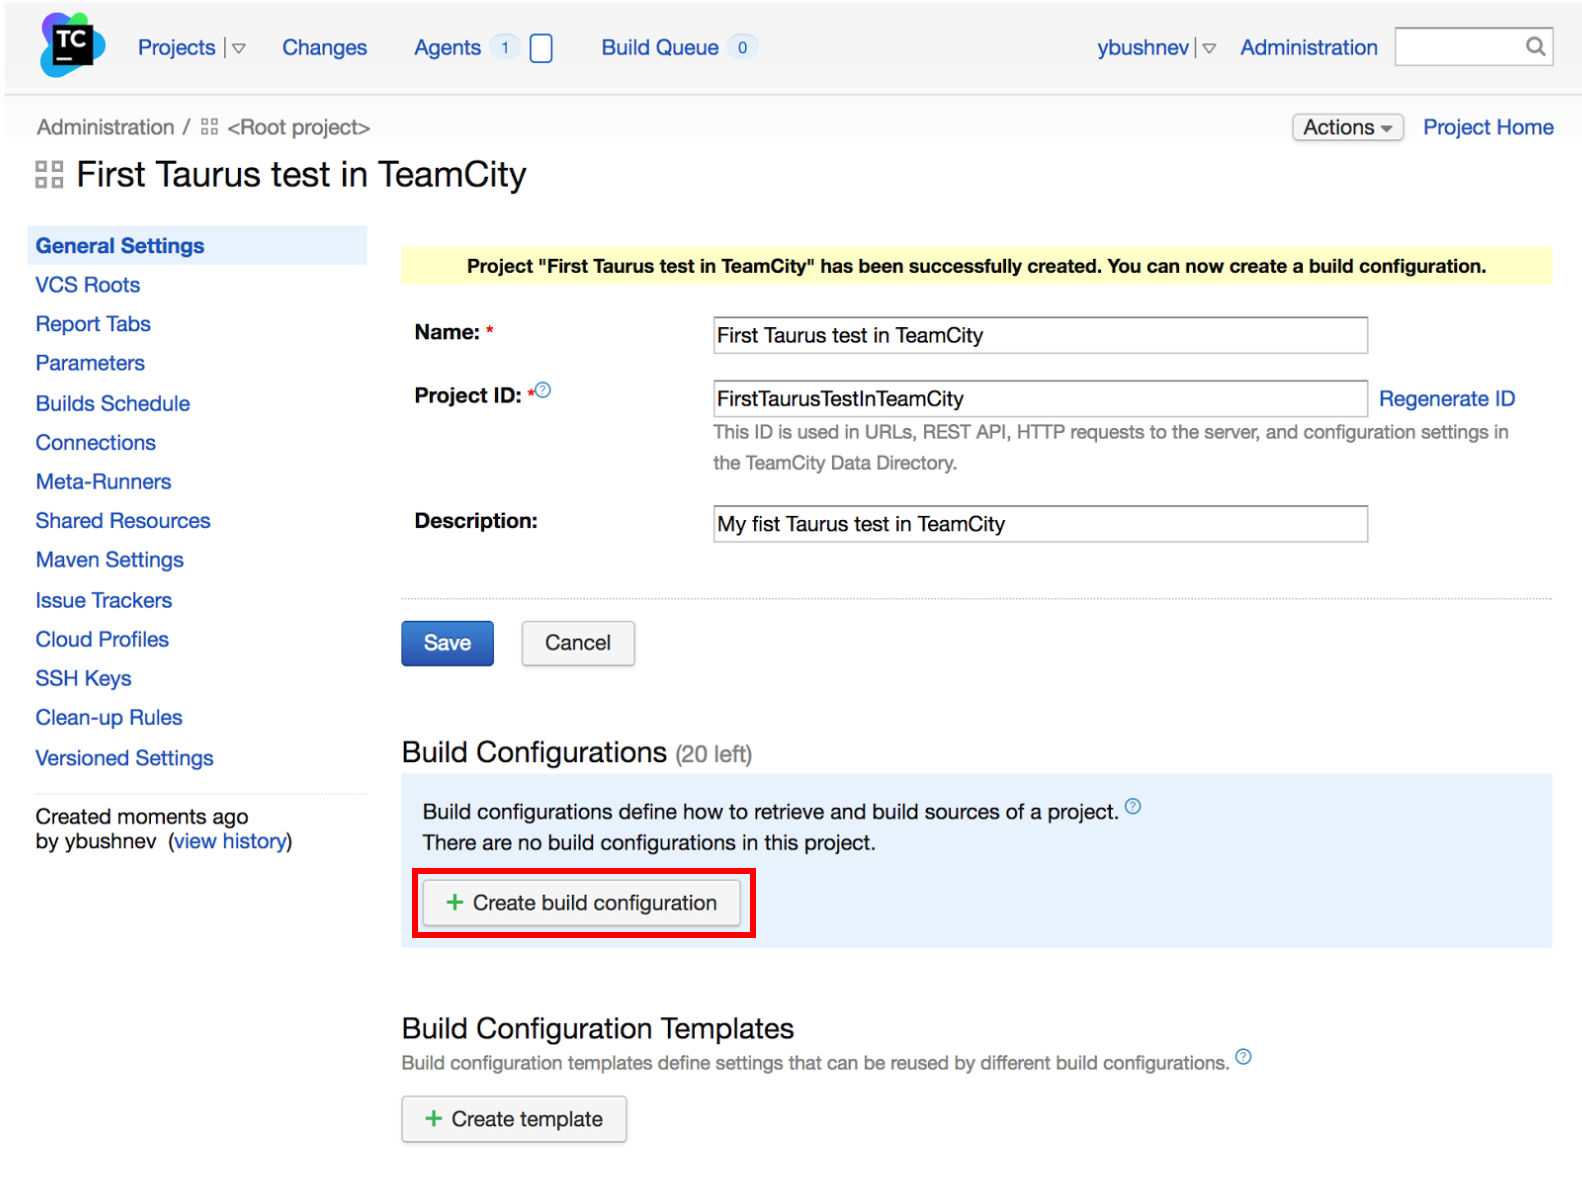
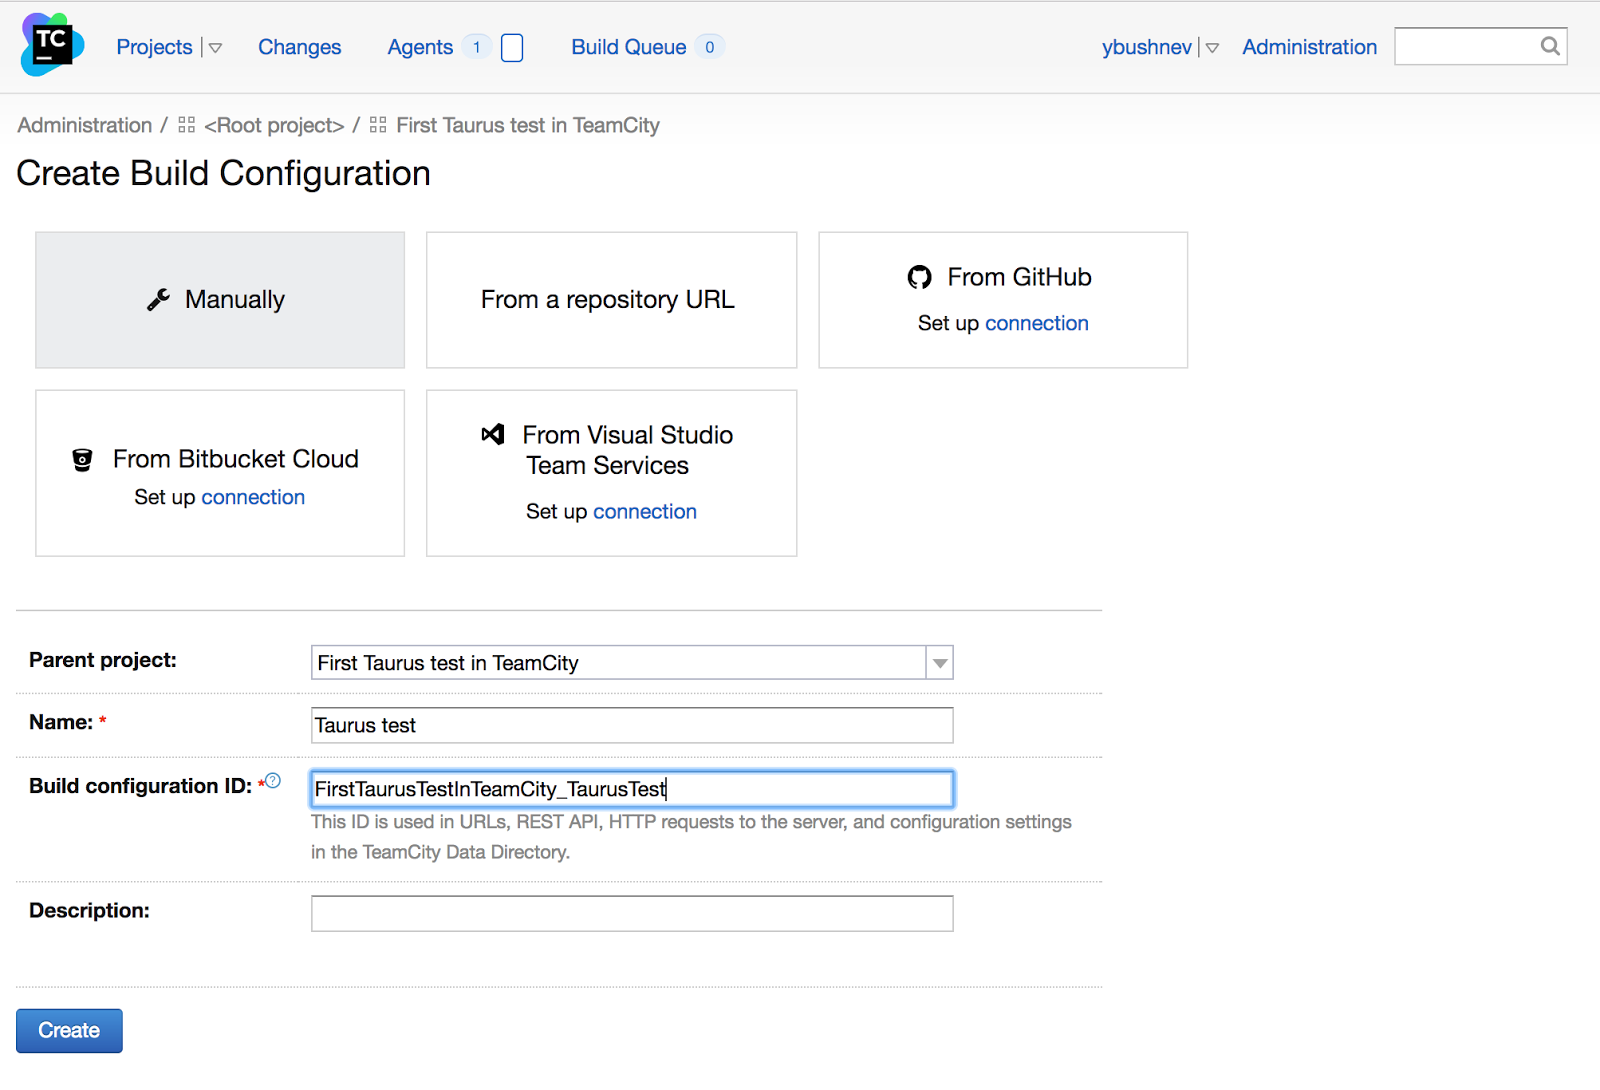
You can choose one of them depending on your needs. You can integrate your source code from a custom repository, GitHub, Bitbucket or the Visual Studio Team service. We are not going to cover these integrations. For our needs, the "Manually" option is enough. In this case we just need to define a name for our project, a unique project id and a description (which is not mandatory). After the project has been created you will be redirected to the main project page. Basically, a project is a container for different build configurations, while the build configuration (build plan) is a sequence of execution steps to perform a specific job. Jobs include deploying a specific service, running tests, and so on. Therefore, if you want to run your tests in CI you need to create a separate build configuration:
The ‘Create Build Configuration’ page looks exactly the same as ‘Create Project’. We need to define name, build configuration id and include an optional description:
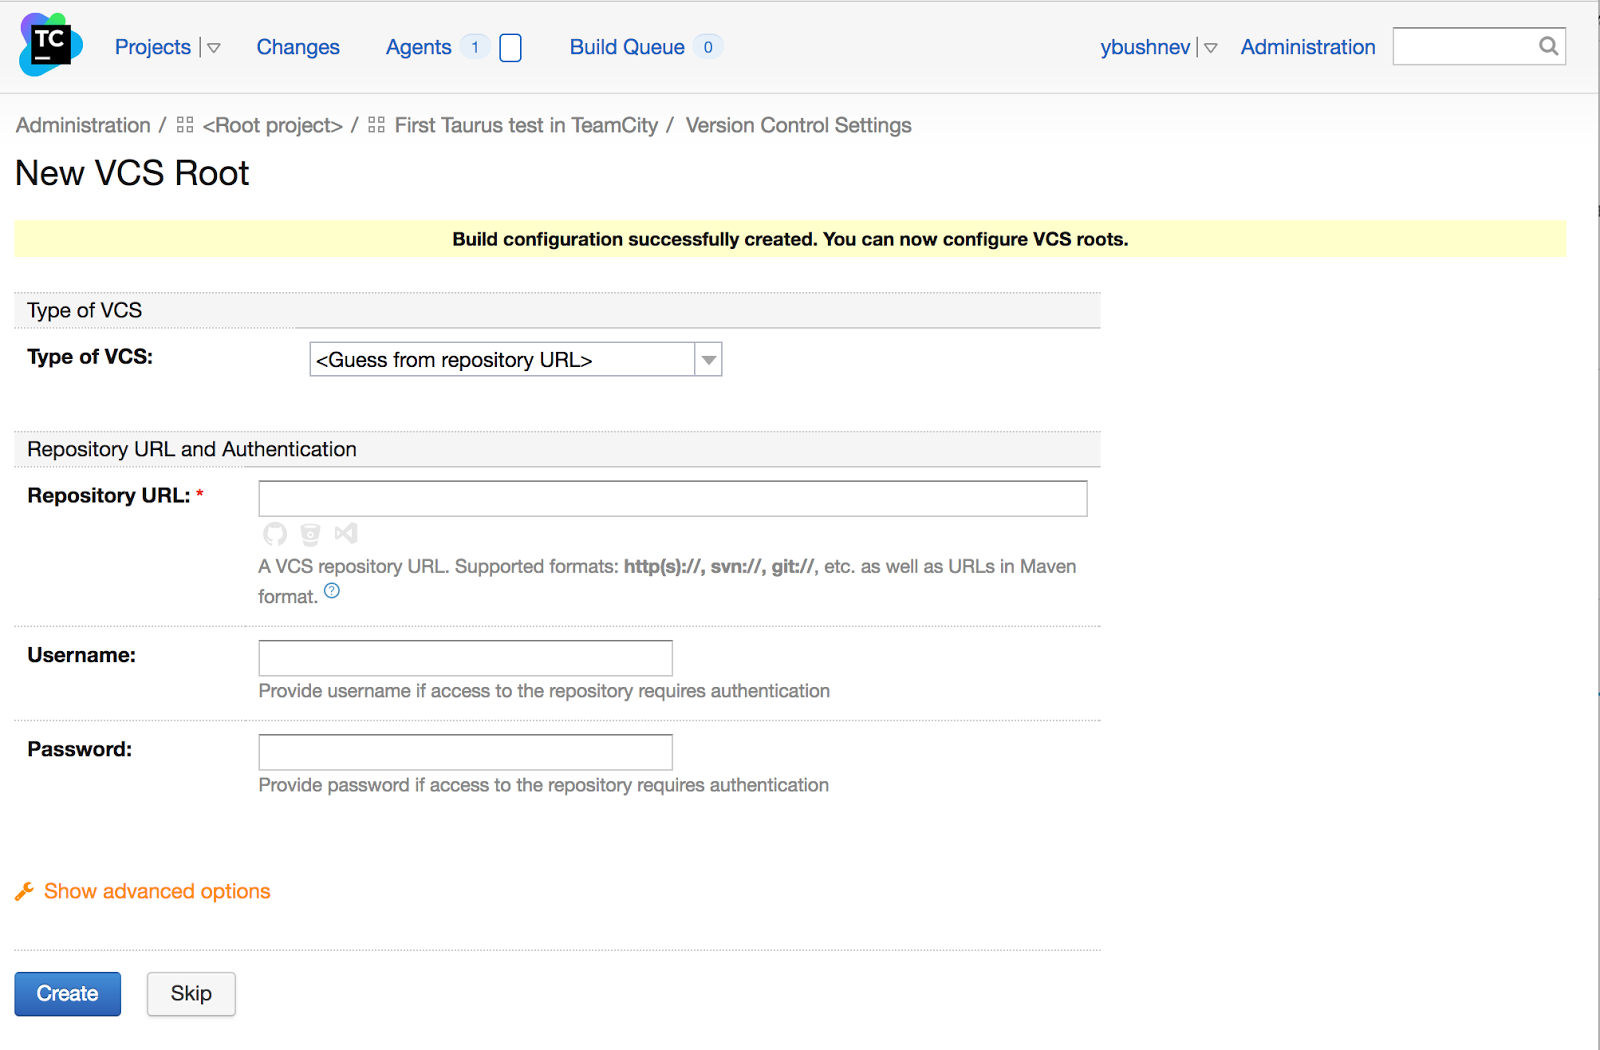
On the second page you can specify version control settings, if you want to check out a performance script from its source code repository. We are going to use a performance script from local machine, so, you can just skip this step and click on the “Create” button without specifying any additional settings.
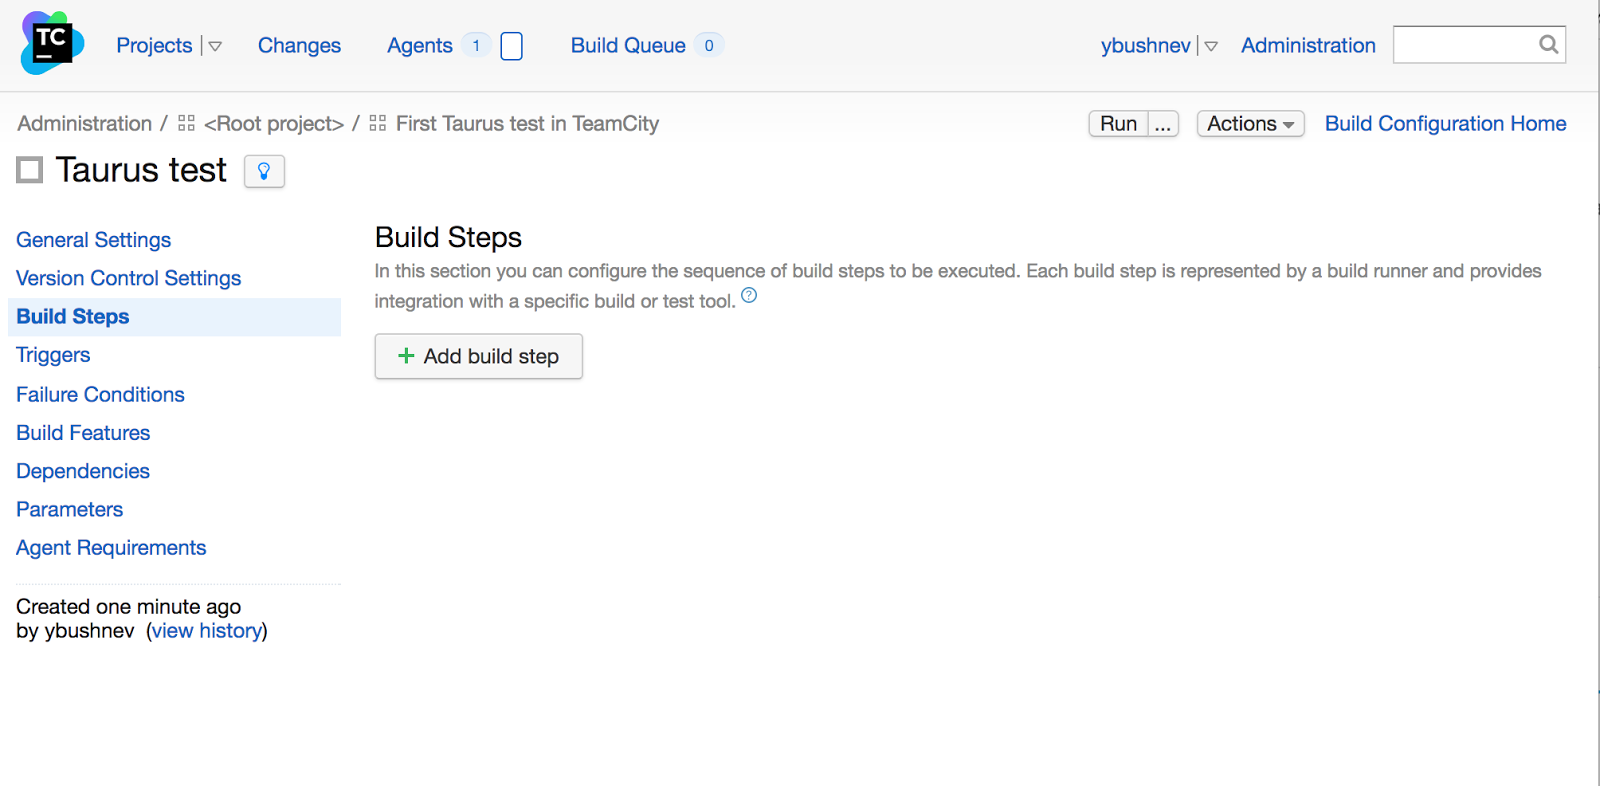
Each build configuration consists of build steps that create logical separation. For example, we can have one build configuration to run three different kinds of tests: smoke, integration and performance. In this case, we will have one build configuration and three steps inside it to run each type of test.
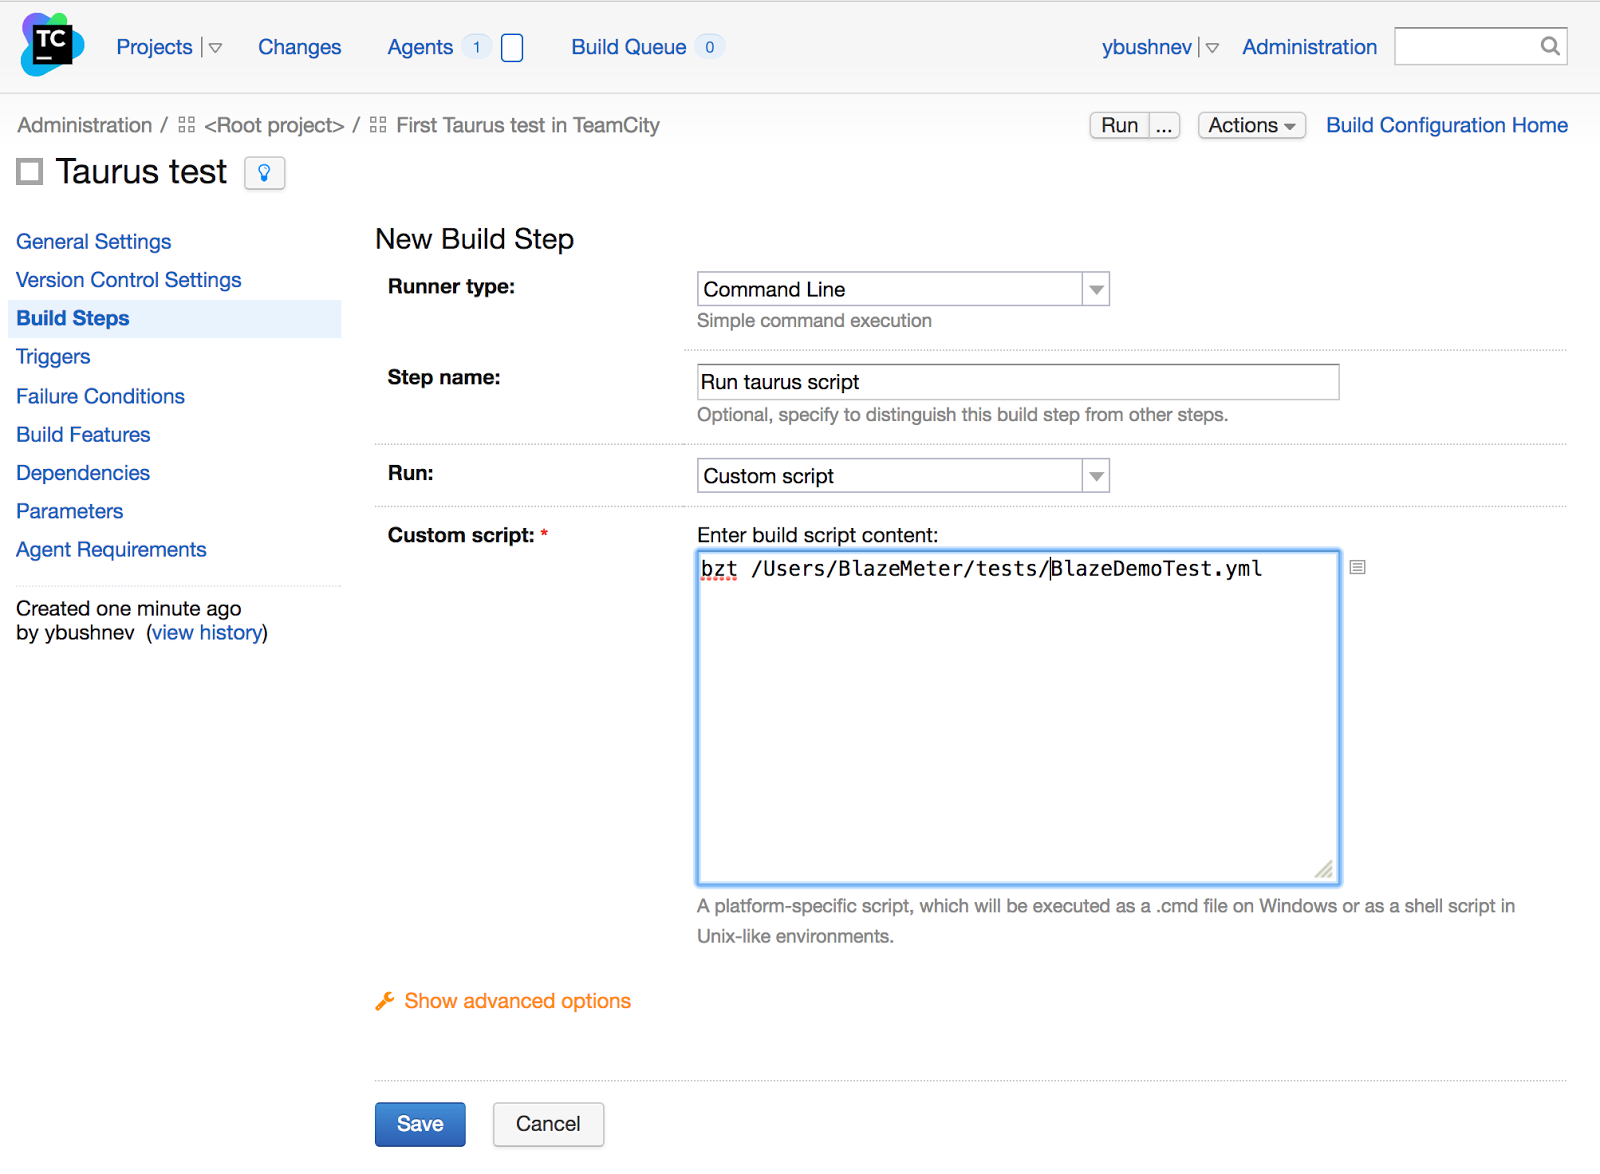
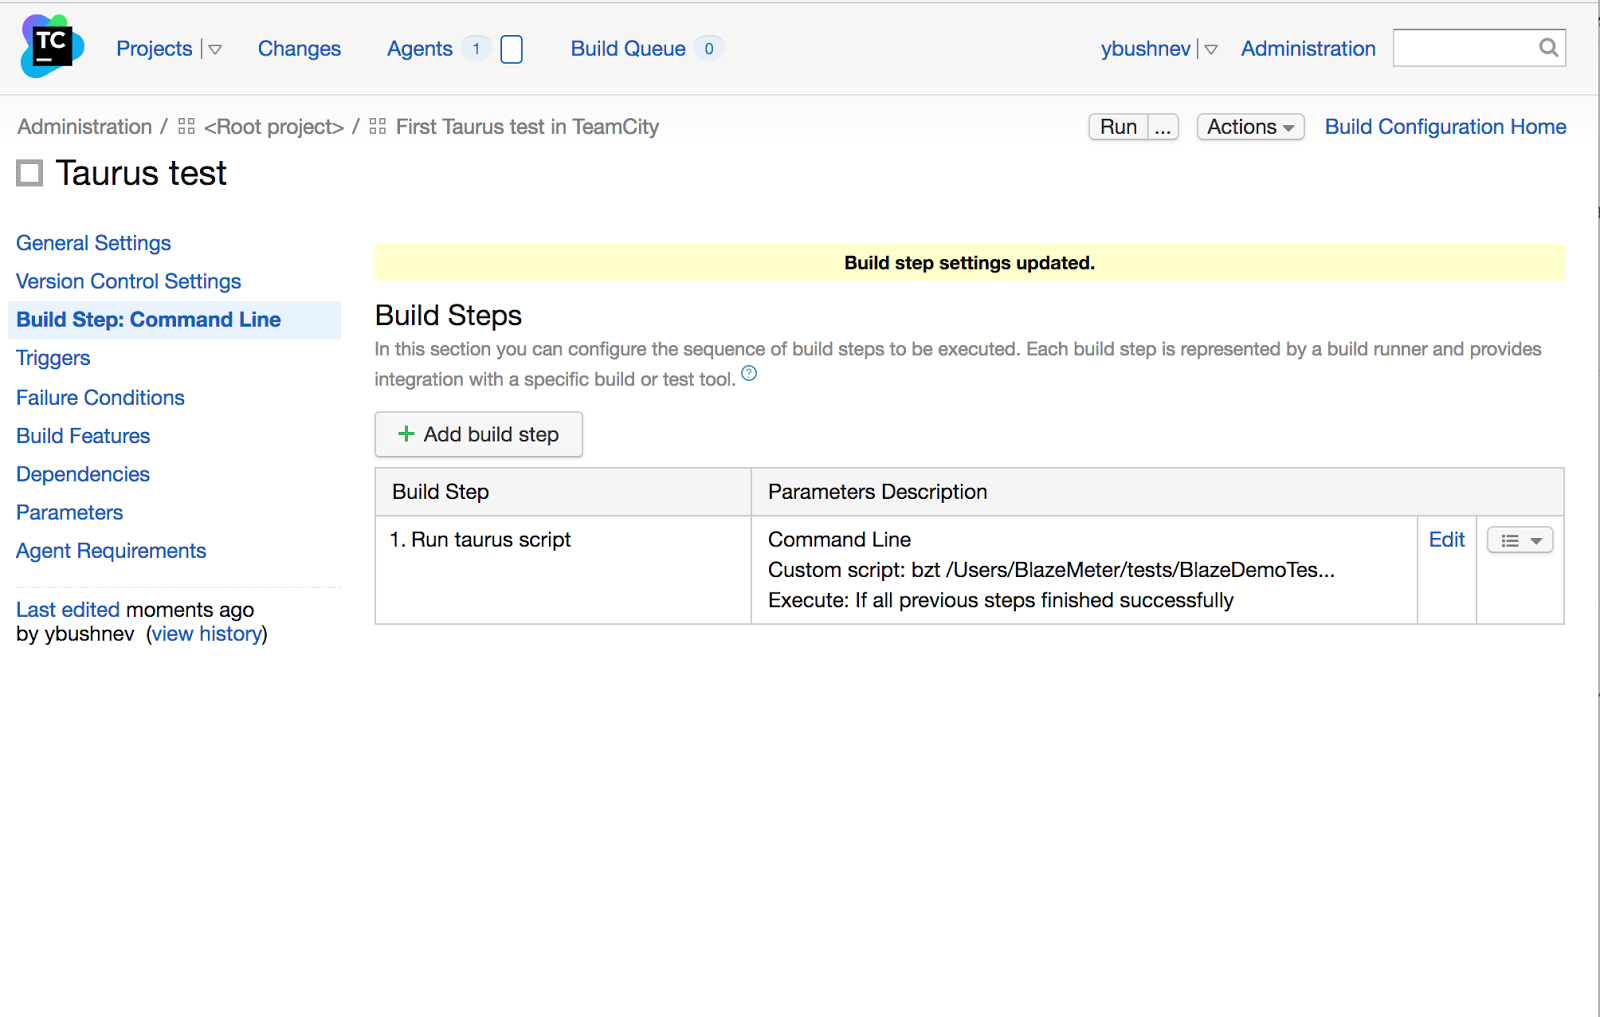
To execute our performance tests we need to use the ‘Command Line’ runner with the ‘Custom script’ run option. In the custom script input we should specify the same command we used before to run our performance script in the command line.
Click on ‘Save’ and we will see that the first build step was created. Now we are able to start our performance script in TeamCity.
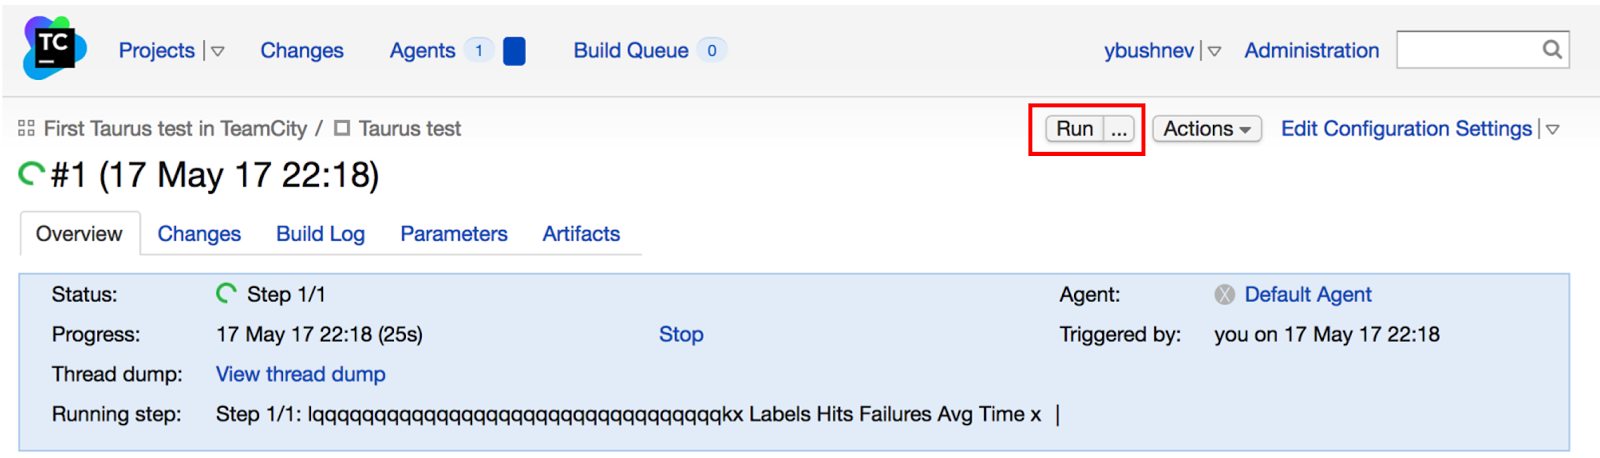
To run the build configuration you need to use the ‘Run’ button in the top right corner.
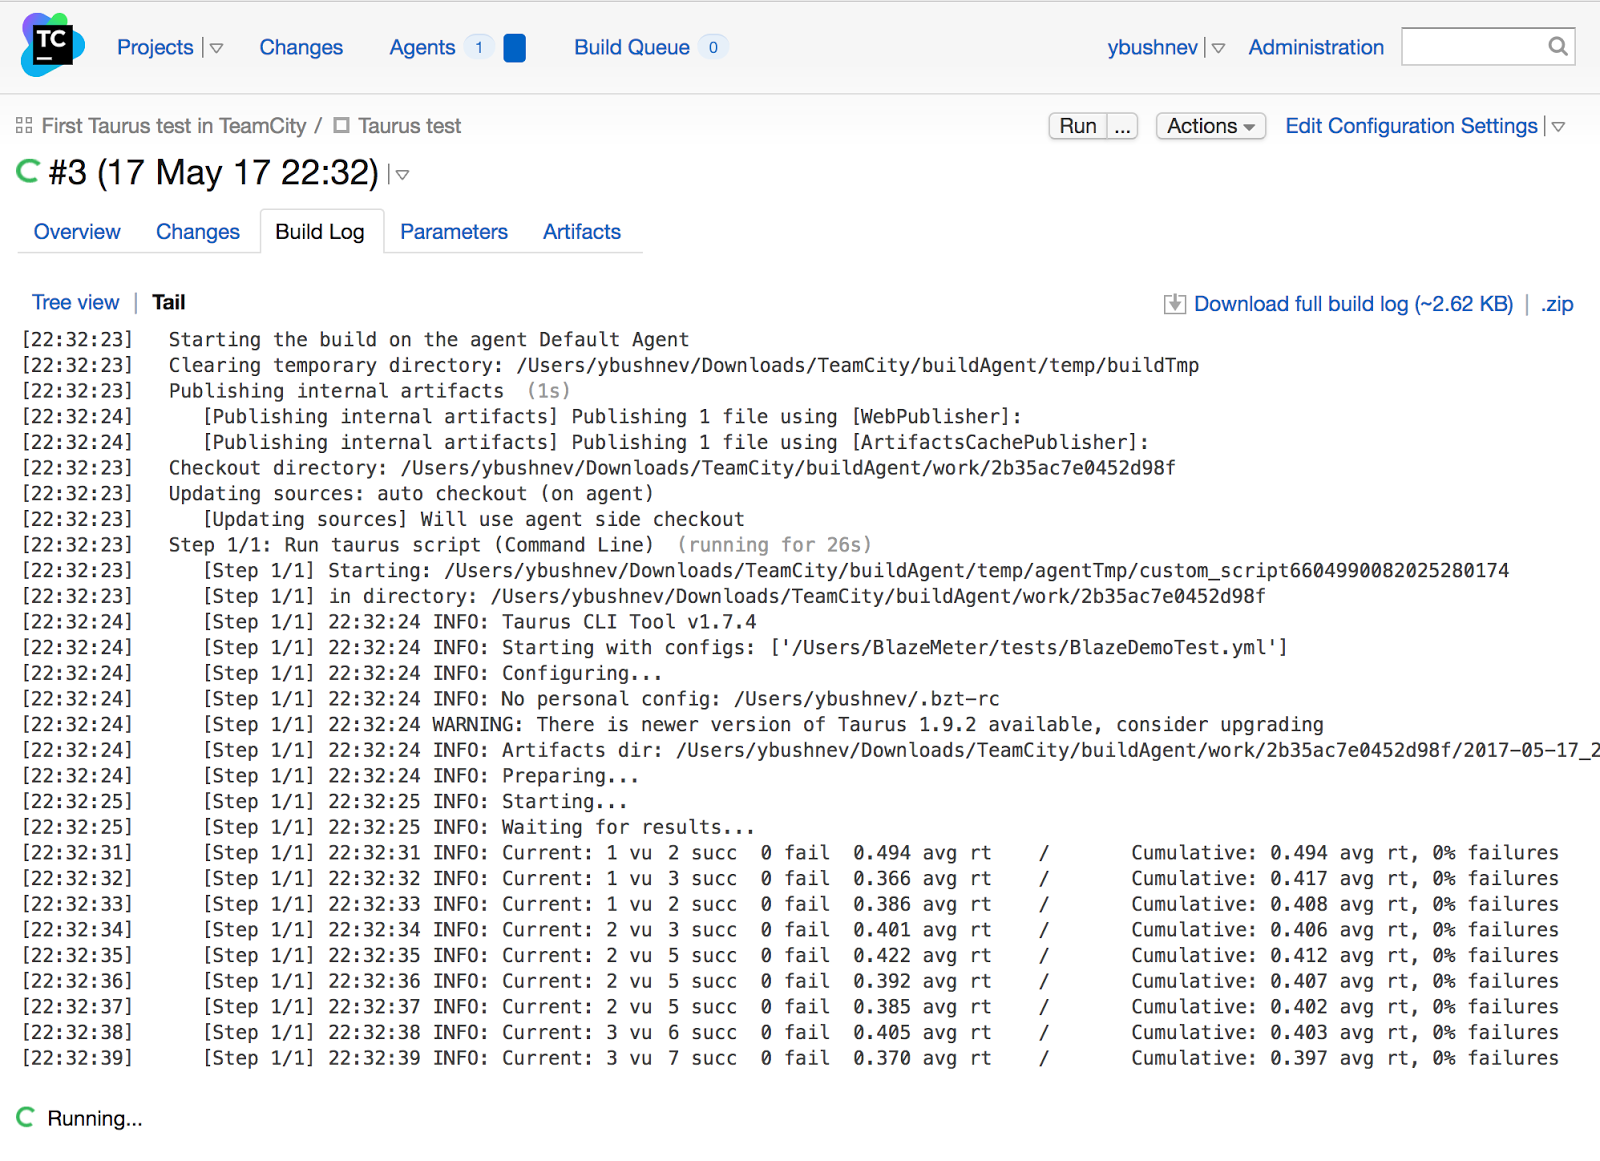
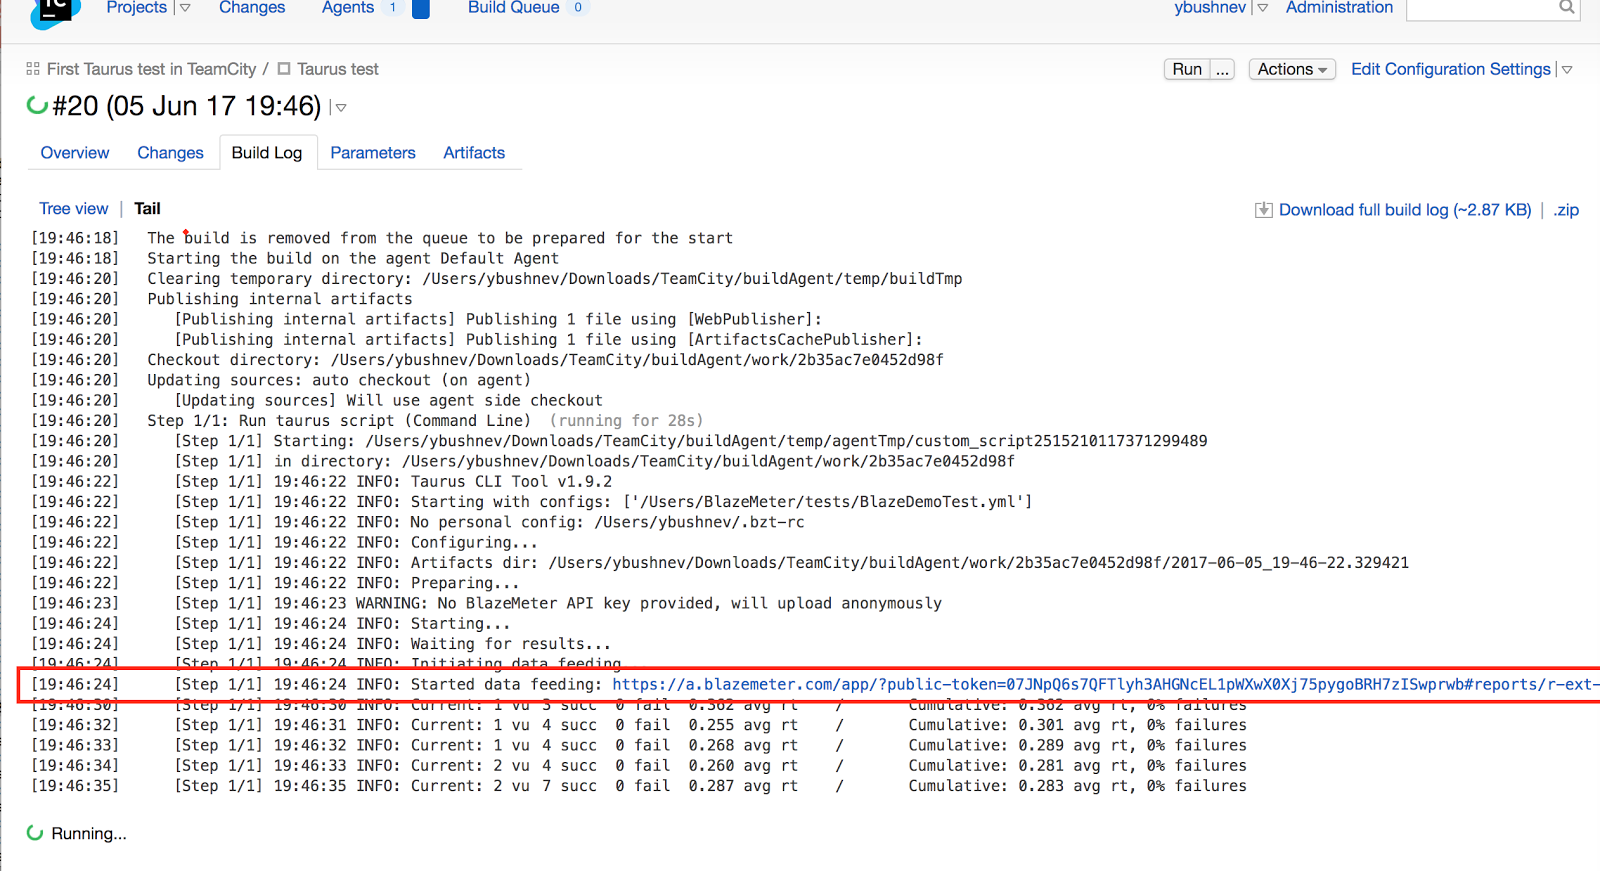
In the ‘Build Log’ tab you can see real-time logs coming from the performance script execution.
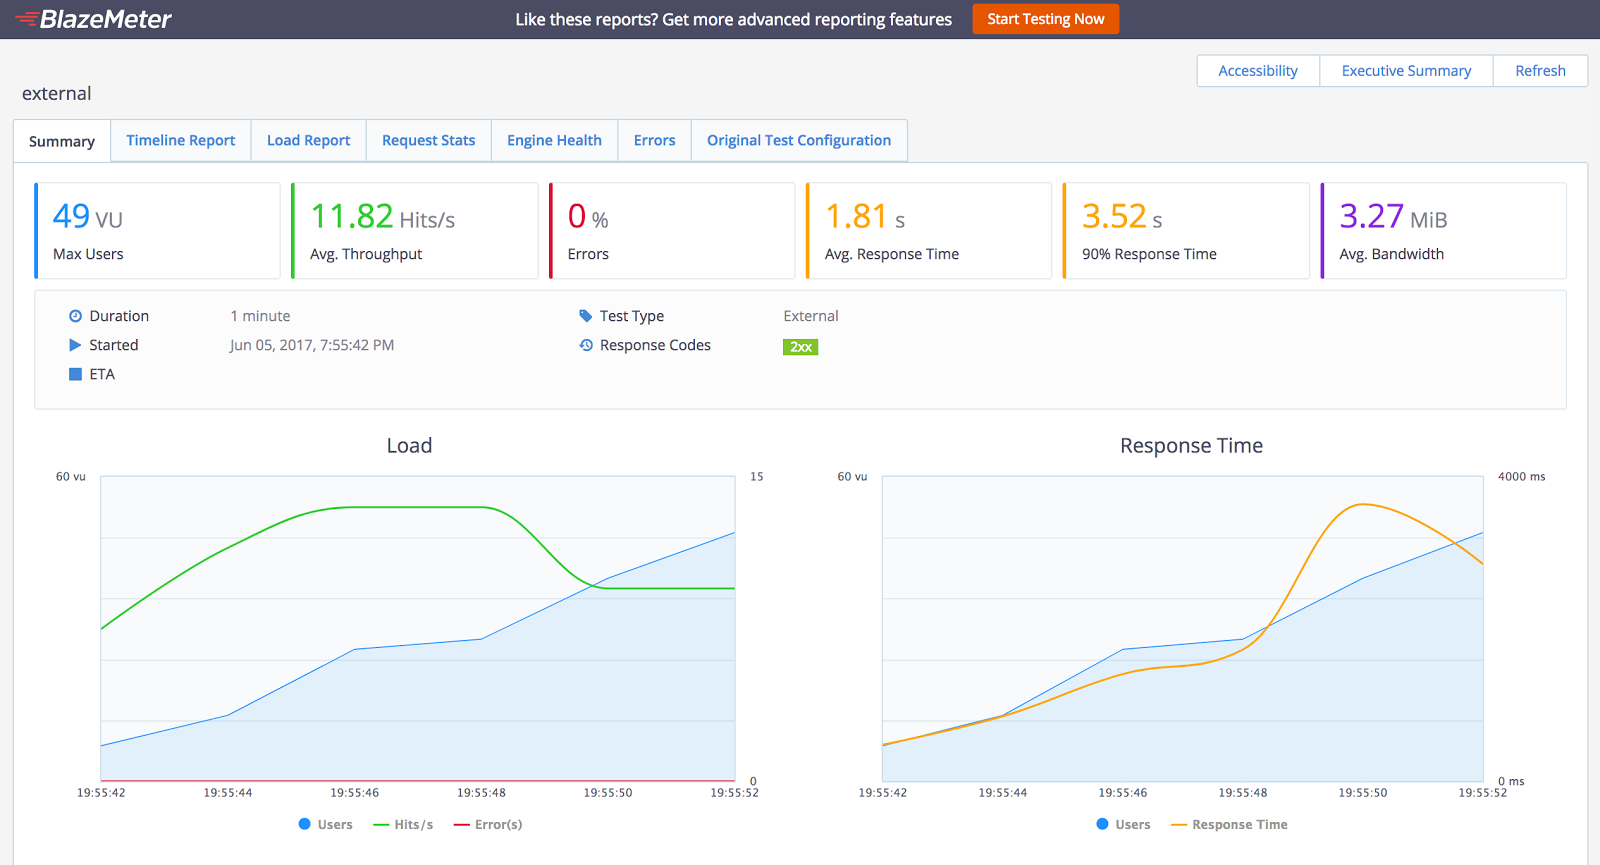
Another great option provided by Taurus is integration with BlazeMeter reporting out-of-the-box. We can use the blazemeter reporter module to upload our test results into blazemeter.com. BlazeMeter provides great reporting and analytics for performance tests. To do that, just add one more command line option. But this time we can use a different way of reporting configuration. Instead of specifying command line parameters, we can open our script and add a reporting section with blazemeter module parameters: execution: - concurrency: 100 ramp-up: 40s hold-for: 1m scenario: Open-BlazeDemo scenarios: Open-BlazeDemo: requests: - url: http://blazedemo.com/ reporting: - module: blazemeter report-name: TeamCity test report test: Taurus with TeamCity Demo project: Taurus with TeamCity After we run our build plan again, our script will automatically initialize a separate browser tab directed to the BlazeMeter application. The BlazeMeter applications collects the statistics from build plan execution and show all useful metrics in real time:
If for any reason browser with the reports has not opened automatically, you can find the link in the build execution logs:
Congratulations! You can now integrate Taurus and TeamCity to easily automate the performance verification of your app and get detailed test reports in real-time. |
On this page:
|